
Homemade Instant Pot Yogurt
Once you make yogurt at home, it’s genuinely difficult to go back to buying it. A gallon of good whole milk and a small container of store-bought Greek yogurt to use as your starter, a few hours of hands-off time in the Instant Pot, and what you end up with is a batch of thick, creamy, completely customizable homemade yogurt that tastes cleaner and richer than anything you can buy. No preservatives, no added thickeners, no unnecessary sugar. Just milk, a live culture, and a little patience.
A Quick Look At The Recipe
- Recipe Name: Homemade Instant Pot Yogurt
- Main Ingredients: whole milk, plain Greek yogurt with live active cultures, Optional, vanilla bean or vanilla extract, maple syrup, Fruit compote
- Why You'll Love It: A simple, nourishing staple that turns one gallon of milk into creamy homemade yogurt.
The Instant Pot makes this almost entirely hands-off. It heats the milk to the right temperature, you cool it down and add the starter, and then it incubates the whole batch overnight while you sleep. By morning you have a full gallon of yogurt ready to strain, flavor, and eat. Strained and beaten smooth with an electric mixer it becomes something silky and luxurious that bears almost no resemblance to the chalky, thin versions that line grocery store shelves. Add vanilla and maple syrup and top with blueberry compote, or leave it plain and use it the way you’d use sour cream in any savory recipe. Either way you’ll wonder why you waited so long to start making it yourself.
Ingredients Needed to Make Instant Pot Yogurt
Two ingredients and some optional flavoring. That’s the whole list.
The Yogurt
- Whole milk, one gallon (whole milk produces the richest, creamiest result; local dairy like Mouton Dairy elevates the flavor even further with fresher, less processed milk)
- Plain Greek yogurt with live active cultures, 12 oz (this is your starter; the live cultures are what inoculate the milk and turn it into yogurt; check the label to confirm it says “live active cultures”)
Optional Flavoring
- Vanilla bean paste or vanilla extract (vanilla bean paste gives more intense, speckled vanilla flavor)
- Maple syrup, 1 to 2 tablespoons, to taste (a natural sweetener that doesn’t overpower the clean dairy flavor)
- Fruit compote for serving (blueberry, strawberry, or any berry compote pairs beautifully with the vanilla version)
How to Make Homemade Instant Pot Yogurt
Most of the time in this recipe is completely hands-off. The active work is about 15 minutes spread across a morning and an evening.
Step 1: Heat the Milk
Pour the entire gallon of whole milk into the Instant Pot insert. Close the lid and set the valve. Select the Yogurt setting and press it again or adjust until it reads High, which is the Boil function. The Instant Pot will heat the milk slowly and safely and beep when it’s finished. When it beeps, open the lid and check the temperature with a thermometer. It should read 161°F. This temperature kills any unwanted bacteria in the milk so that only the cultures you introduce will grow during fermentation.
Step 2: Cool the Milk
Remove the inner pot from the Instant Pot and let the milk cool to 110°F. This takes about 30 minutes at room temperature. You can speed it up by setting the inner pot in a sink of cool water and stirring occasionally. Do not add the starter until the milk reads 110°F or below. Higher temperatures will kill the live cultures in the starter and the yogurt will not set. Check with a thermometer rather than guessing.
Step 3: Temper the Starter
While the milk cools, measure out the 12 oz of Greek yogurt into a small bowl. Once the milk has reached 110°F, spoon a ladleful of the warm milk into the bowl with the yogurt and whisk until smooth. This tempering step brings the yogurt to a temperature closer to the milk before it’s mixed in, preventing the cultures from being shocked by the temperature difference and ensuring they blend in evenly and smoothly.
Step 4: Culture the Yogurt
Pour the tempered yogurt mixture back into the Instant Pot insert and stir gently and thoroughly to distribute the cultures evenly throughout the milk. Return the insert to the Instant Pot, close the lid, and select the Yogurt setting on Low. Set the time for 9 hours. The Instant Pot will maintain the perfect incubation temperature without any further attention from you. The longer the culture time, the tangier the finished yogurt. Nine hours produces a pleasantly tangy, balanced result. Overnight (10 to 12 hours) gives you something slightly more tart.
Step 5: Check and Cool
When the Instant Pot beeps, open the lid. The yogurt should be set and jiggle gently like a loose panna cotta rather than sloshing around like milk. If it hasn’t set, close the lid and culture for another 1 to 2 hours. Once set, refrigerate the yogurt in the insert for at least 2 hours before straining. Chilling firms it up and makes it easier to work with.
Step 6: Strain for Greek Yogurt
For thick Greek-style yogurt, set up your straining station. Line a large strainer or colander with a double layer of cheesecloth and set it over a large bowl deep enough to collect the whey without the strainer touching the liquid. Pour or ladle the chilled yogurt into the cheesecloth-lined strainer. Cover with plastic wrap or a clean kitchen towel and return to the refrigerator. Strain for 4 to 5 hours for thick, creamy Greek yogurt, or overnight for an ultra-thick, almost labneh-style consistency. The longer it strains the thicker it gets.
Step 7: Beat Until Smooth
Transfer the strained yogurt to a large mixing bowl. Using an electric mixer fitted with the whisk attachment, beat the yogurt on medium-high speed for 1 to 2 minutes until it’s completely smooth, silky, and slightly lightened in texture. This step is optional but highly recommended. It transforms the yogurt from slightly grainy and dense to something genuinely luxurious and creamy.
Step 8: Flavor and Serve
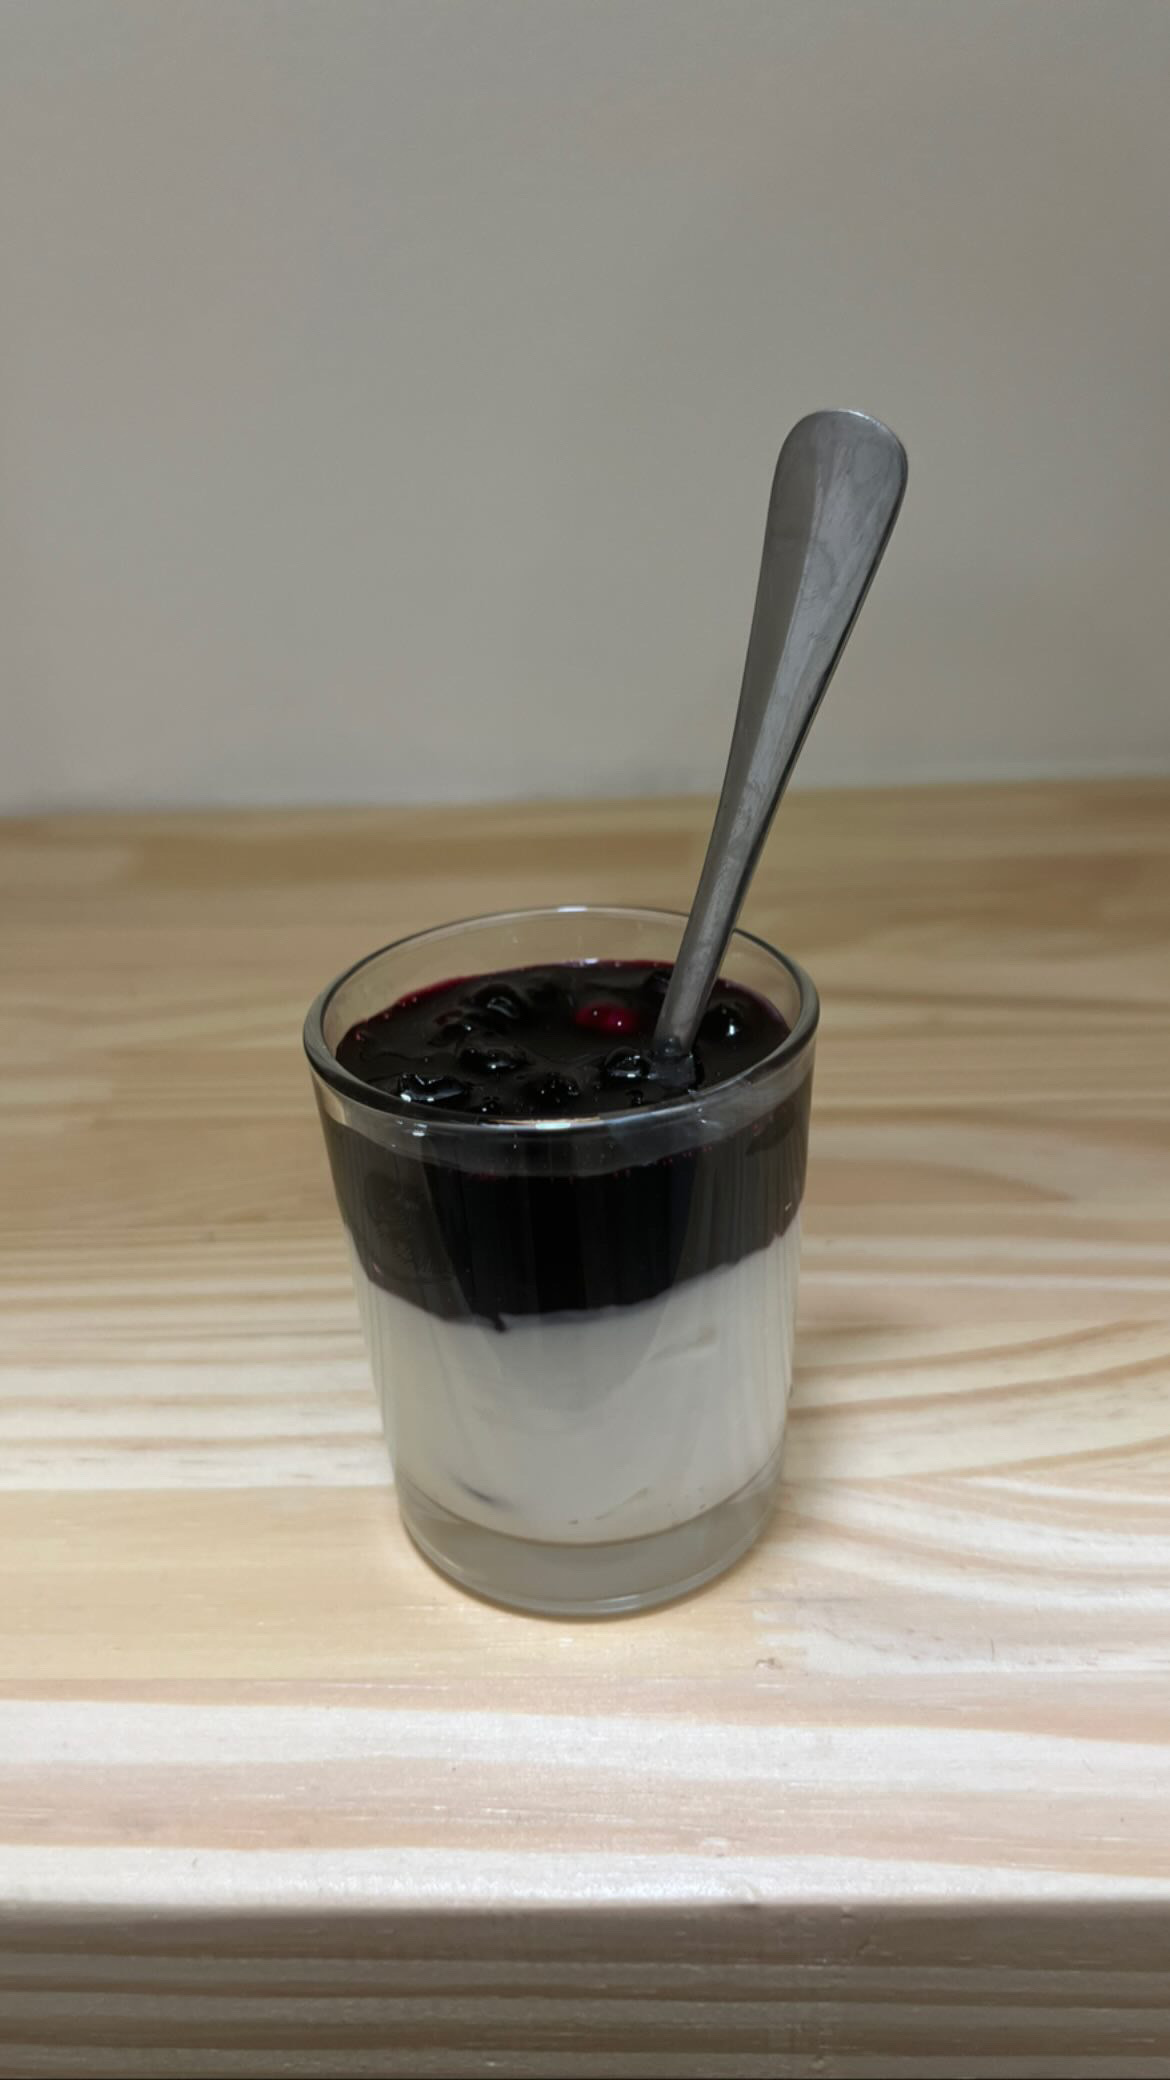
For sweet vanilla yogurt, whisk in the vanilla bean paste or extract and maple syrup to taste. Start with 1 tablespoon of maple syrup, taste, and add more if needed. The yogurt should taste lightly sweet and clean. Serve topped with fruit compote. Blueberry compote is an exceptional pairing with the vanilla flavor.
For savory use, leave the yogurt completely plain. It can be used anywhere you would use sour cream: stirred into soups, dolloped on tacos, mixed into dips, or served alongside roasted vegetables.
Storing and Make-Ahead Tips
Store the finished yogurt in sealed glass jars or airtight containers in the refrigerator for up to 2 weeks. The yogurt will continue to develop a slightly tangier flavor over time, which most people enjoy. Store flavored and plain yogurt separately so you have both options available throughout the week.
The whey collected during straining is nutritious and protein-rich. Don’t discard it automatically. It can be used in smoothies in place of water, added to bread or pancake dough for extra protein and a slight tang, stirred into soups for added body, or used to soak grains. It keeps in the refrigerator for up to 2 weeks.
Most importantly, save 12 oz of each batch before eating to use as the starter for your next batch. This creates a continuous yogurt-making cycle using your own cultured yogurt rather than buying a new container of starter each time. The culture will remain strong and active through multiple batches as long as you maintain the cycle.
How to Serve Homemade Instant Pot Yogurt
The sweet vanilla version served in a bowl topped with warm blueberry compote and a drizzle of extra maple syrup is a breakfast that feels genuinely indulgent while being completely wholesome. Add a handful of granola for crunch and it’s a complete, satisfying morning meal.
For savory use, the plain yogurt is an excellent, lower-fat substitute for sour cream on tacos, in dips, dolloped on soups, or stirred into sauces. It functions identically to sour cream in any recipe while adding protein and probiotics.
Frequently Asked Questions About Instant Pot Yogurt
Why does the milk need to reach 161°F?
Heating the milk to 161°F pasteurizes it, killing any wild bacteria or unwanted microorganisms that could compete with the cultures you’re introducing in the starter. Without this step, the wrong bacteria could take over during the long incubation period and produce off-flavors or prevent the yogurt from setting properly. This step is not optional and cannot be skipped regardless of what milk you use.
Why does the milk need to cool to 110°F before adding the starter?
Live cultures, which are bacteria, have a specific temperature range in which they thrive. Above about 120°F the heat begins killing them. At 110°F they are alive, active, and ready to multiply into the warm milk. Adding the starter to milk that is still too hot will kill the cultures entirely and the yogurt will not set regardless of how long it incubates.
What makes a good yogurt starter?
Any plain Greek yogurt or regular yogurt that lists “live active cultures” on the label will work as a starter. The cultures it contains are what inoculate your milk. Chobani, Fage, Stonyfield, and Siggi’s are all reliable choices. The fresher the yogurt the more active the cultures. Avoid flavored yogurt or yogurt with added thickeners since those can interfere with the fermentation process.
Why didn’t my yogurt set?
The three most common reasons are milk that was too hot when the starter was added (killing the cultures), starter yogurt that didn’t have live active cultures, or insufficient incubation time. If the yogurt hasn’t set after 9 hours, close the lid and run another 1 to 2 hours of incubation before concluding it hasn’t worked. Also verify that your Instant Pot’s Yogurt Low setting is maintaining a temperature between 100°F and 110°F during incubation.
Homemade Instant Pot Yogurt
Ingredients
Method
- Pour the 1 gallon of milk into the Instant Pot.
- Close the lid and select the Yogurt setting on High (Boil).
- The Instant Pot will heat the milk and beep when it’s finished.
- Check the temperature with a thermometer to ensure it has reached 161°F.
- Allow the milk to cool to 110°F, which usually takes about 30 minutes.
- In a small bowl:
- Add the 12 oz Greek yogurt.
- Stir in a small amount of the warm milk from the pot.
- Whisk until smooth.
- This step tempers the yogurt so it blends smoothly.
- Pour the tempered yogurt mixture back into the Instant Pot and stir gently.
- Place the lid back on and set the Instant Pot to:
- Yogurt setting – Low for 9 hours (or overnight)
- When finished, the Instant Pot will beep and the yogurt will be set.
- At this stage, you now have regular homemade yogurt.
- Optional: Make Greek Yogurt
- Place a cheesecloth-lined strainer over a large bowl.
- Pour the yogurt into the strainer.
- Cover and refrigerate about 5 hours or overnight, depending on how thick you prefer it.
- The liquid collected in the bowl is whey.
- You may discard it or use it in other recipes.
- Transfer the strained yogurt to a large bowl.
- Use an electric mixer with a whisk attachment to beat the yogurt until smooth and creamy.
Notes
• vanilla bean or extract
• maple syrup to taste Whisk until smooth. Serve topped with fruit compote.
Blueberry compote pairs beautifully. ⸻ Savory Yogurt Leave plain and use as a healthier substitute for sour cream in recipes.